adp-electrical.com

adp-electrical.com

How To Install Home Lighting & Chandeliers

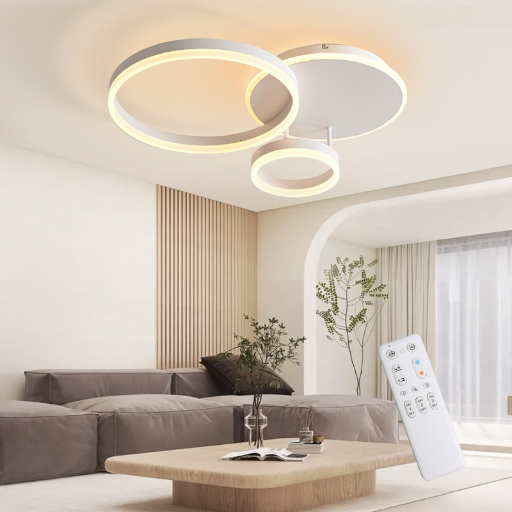
Installing lighting fixtures and chandeliers can seem like a daunting task, but with the right tools and a bit of guidance, you can transform your space with beautiful lighting. This guide will walk you through the process, from choosing the right fixtures to troubleshooting common issues. Key Takeaways Always assess your lighting needs before purchasing fixtures to ensure they meet your requirements. Prioritize safety by turning off the power and using proper tools during installation. Follow step-by-step instructions for both ceiling lights and chandeliers to ensure a secure fit. Regular maintenance and cleaning will extend the life and performance of your lighting fixtures. Troubleshoot common issues like flickering lights and loose fixtures to maintain optimal lighting. Choosing the Right Lighting Fixtures Assessing Your Lighting Needs Before picking out any lighting, think about what each room needs. For a living room, versatility and ambiance are key. Consider a combination of overhead lighting, such as a fan/light combination, flush mount, chandelier, or other fixtures. In a kitchen, bright task lighting is essential, while bedrooms benefit from softer, more relaxing lights. Types of Lighting Fixtures There are many types of lighting fixtures to choose from: Ceiling Lights: These include chandeliers, pendant lights, and flush mounts. Wall Lights: Sconces and wall lamps fall into this category. Portable Lights: Think table lamps and floor lamps. Recessed Lights: These are installed into the ceiling for a sleek look. Energy Efficiency Considerations When choosing lighting fixtures, it’s important to think about energy efficiency. LED lights are a great option because they use less energy and last longer than traditional bulbs. Look for fixtures that are compatible with LED bulbs to save on energy costs in the long run. Choosing the right lighting fixtures can make a big difference in how your home looks and feels. Take your time to assess your needs and explore different options to find the perfect fit. Preparing for Installation Gathering Necessary Tools and Materials Before you start, make sure you have all the tools and materials you need. Here’s a list to help you get started: Screwdriver Wrench Pliers (with rubber-coated handles) Colored tape (or masking tape & pen for labeling) Wire connectors Wire stripper Fan brace or heavy-duty electrical box Mounting strap Stepladder Assistant (recommended) Having these items ready will make the process smoother and quicker. Ensuring Electrical Safety Safety is the most important part when working with electrical systems. Always turn off the power at the circuit breaker before you begin. Use a voltage tester to make sure the wires are not live. If you’re not sure about the wiring, it’s best to hire a professional. Measuring and Marking Installation Points Accurate measurements are key to a successful installation. Measure the area where you plan to install the fixture and mark the points where you’ll need to drill or attach hardware. This will help ensure that your new lighting fixture is securely and attractively placed. Taking the time to measure and mark correctly can save you a lot of hassle later on. Double-check your measurements to avoid mistakes. Installing Ceiling Lights Removing Existing Fixtures First, turn off the electricity to the room at the main circuit breaker. As an extra safety step, turn off the light switch on the wall. Use a non-contact voltage tester to make sure the power is off. Working with electricity can be dangerous, so always follow safety guidelines. Next, remove the old light fixture. Unscrew the fixture from the ceiling and disconnect the wires. Be careful not to damage the wires, as you’ll need them for the new fixture. Installing Mounting Hardware Before you install the new light, you need to put in the mounting hardware. If the fixture is under a ceiling joist, use a pancake-style box. These are round metal boxes that can hold heavy fixtures. Attach the box to the ceiling joist with the screws that came with it. Make sure the wires go through the hole in the side of the box so you can reach them later. Connecting Electrical Wires Now it’s time to connect the wires. Match the wires from the ceiling to the wires on the new fixture. Usually, this means connecting black to black, white to white, and green or copper to the ground wire. Use wire nuts to secure the connections. Once the wires are connected, tuck them into the ceiling box. Tip: Insert the adjustable-length box bar into the ceiling hole and twist until its teeth bite into the ceiling structure. Use a hanging clip to connect the wires. Finally, attach the new fixture to the mounting hardware. Make sure everything is secure before you turn the power back on. Test the light to make sure it works properly. Installing Chandeliers Selecting the Right Chandelier Choosing the perfect chandelier involves considering the room’s size, style, and ceiling height. Ensure the chandelier complements the room’s decor and provides adequate lighting. Measure the room to determine the appropriate chandelier size. Assembling the Chandelier Before mounting, assemble the chandelier by screwing all parts together, except for the canopy that attaches to the ceiling. Avoid installing the light bulbs at this stage to make the process easier and safer. Mounting the Chandelier Install a mounting strip to your junction box if one isn’t already in place. This metal bar should come with your chandelier or can be purchased at a hardware store. Thread the chandelier wires through each section, including the chain links and the metal canopy that covers the electrical box. Connect the wiring: black to black, white to white, and bare/green to bare. As a safety measure, wrap electrical tape around each individual wire connector. Bolt the chandelier into place by screwing in the bolts or lock nuts to secure it to the ceiling. This process may vary depending on your chandelier model, so refer to the instructions for specific attachment points. Take your time to ensure each step is done correctly. Rushing can lead to mistakes and potential safety hazards. By following these steps, you

How To Install Home Lighting & Chandeliers Read More »

How To Install Smart Switches And Motion Sensors

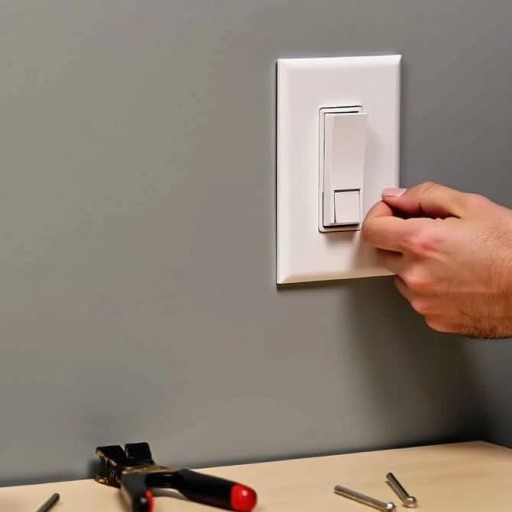
Installing smart switches, timers, and motion detector switches can make your home more convenient and energy-efficient. These devices allow you to control your lights and other appliances with ease, whether you’re using a smartphone app, a timer, or motion detection. This guide will walk you through the process of installing these smart devices, from understanding their benefits to troubleshooting common issues. Key Takeaways Smart switches let you control your lights remotely and can be integrated with home automation systems. Timers are useful for setting lights to turn on and off at specific times, saving energy and adding security. Motion detector switches automatically turn lights on when they detect movement, which is great for security and convenience. Proper installation requires the right tools and safety equipment to ensure a safe and effective setup. Troubleshooting common issues can help you maintain the functionality of your smart devices and keep your home running smoothly. Understanding Smart Switch Installation What is a Smart Switch? A smart switch is a device that allows you to control your lights and other electrical fixtures remotely using a smartphone app or voice commands. By following the manufacturer’s instructions and using a smartphone app to configure the new switch, you can easily complete the setup and ensure that your smart switch works properly. Benefits of Smart Switches Smart switches offer several advantages: Remote control of lights and appliances Energy savings through automation Enhanced home security with scheduled lighting Integration with other smart home devices Types of Smart Switches There are various types of smart switches available, including: Standard Smart Switches: Basic on/off control via app or voice. Dimmer Switches: Allow you to adjust the brightness of your lights. Motion Sensor Switches: Automatically turn lights on or off based on movement. Timer Switches: Schedule lights to turn on or off at specific times. Smart switches are a great way to modernize your home and make everyday tasks more convenient. Tools and Materials Needed for Installation Essential Tools To install smart switches, timers, and motion detector switches, you’ll need a few basic tools. The necessary tools include wire cutters or pliers, a terminal screwdriver, a knife, and optionally, a drill with large drill bits if modifications to the wall are needed. Here’s a quick list: Wire cutters or pliers Terminal screwdriver Knife Drill with large drill bits (optional) Recommended Materials Having the right materials on hand will make the installation process smoother. Make sure you have: Smart switches, timers, or motion detector switches Electrical tape Wire nuts Mounting screws Wall plates Safety Equipment Safety should always come first when working with electrical components. Equip yourself with the following safety gear: Insulated gloves Safety goggles Voltage tester Always double-check that the power is off before starting any electrical work to avoid accidents. Step-by-Step Guide to Installing Smart Switches Preparing Your Work Area Before you start, make sure to turn off the power at the circuit breaker to avoid any accidents. Gather all the tools and materials you’ll need, such as a screwdriver, wire stripper, and the smart switch itself. Clear the area around the switch to give yourself enough room to work. Wiring the Smart Switch Remove the existing switch by unscrewing the faceplate and disconnecting the wires. Connect the wires from your wall to the corresponding terminals on the smart switch. Usually, these are labeled as "Line," "Load," "Neutral," and "Ground." Secure the smart switch into the wall box and screw the faceplate back on. Testing the Installation Once everything is wired up, turn the power back on at the circuit breaker. Test the switch by turning it on and off to make sure it works correctly. If it doesn’t, double-check your wiring connections. Every switch needs a dedicated wall space, so ensure it’s properly installed. Proper installation is key to ensuring your smart switch functions correctly and safely. Installing Timers for Your Lights Choosing the Right Timer When selecting a timer for your lights, consider the type of lights you have and the specific needs of your household. Timers can help save energy and ensure your lights are only on when needed. There are various types of timers available, such as plug-in timers, in-wall timers, and smart timers that can be controlled via an app. Wiring a Timer Switch Turn off the power at the circuit breaker to ensure safety. Remove the existing light switch by unscrewing it from the wall plate and disconnecting the wires. Connect the wires from the timer switch to the corresponding wires in the wall. Typically, this involves connecting the black wire to the hot wire, the white wire to the neutral wire, and the green wire to the ground wire. Secure the timer switch into the wall box and attach the wall plate. Turn the power back on and test the timer to ensure it is working correctly. Programming the Timer Once the timer is installed, you need to program it to fit your schedule. Most timers have simple instructions for setting the on and off times. Plug the timer into an electrical outlet and connect your light. Set the desired times for the light to turn on and off, ensuring it aligns with your daily routine. Some advanced timers also allow for multiple settings throughout the day. Setting timers on often forgotten lights can give you peace of mind, knowing they will turn off automatically. By following these steps, you can easily install and program a timer for your lights, making your home more energy-efficient and convenient. Setting Up Motion Detector Switches Selecting the Appropriate Motion Detector Choosing the right motion detector is crucial. Consider the area you want to monitor and the type of motion detector that fits your needs. There are different types, such as passive infrared (PIR) sensors, ultrasonic sensors, and dual-technology sensors. Each has its own advantages and limitations. Installation Process Turn off the power at the circuit breaker to ensure safety. Remove the existing switch cover and unscrew the old switch from the electrical box. Attach the

How To Install Smart Switches And Motion Sensors Read More »

How To Fix/Replace GFCI Outlet

Replacing a GFCI outlet might seem like a daunting task, but with the right tools and a bit of know-how, you can do it yourself. GFCI outlets are crucial for safety, especially in areas prone to moisture like bathrooms, kitchens, and garages. This guide will walk you through the process step-by-step, ensuring you can replace a faulty GFCI outlet safely and efficiently. Key Takeaways Understand what a GFCI outlet is and how it works. Always turn off the power before starting any electrical work. Use the right tools and safety gear to protect yourself. Follow a step-by-step process to replace the outlet correctly. Regularly test your GFCI outlets to ensure they are functioning properly. Understanding GFCI Outlets What is a GFCI Outlet? A GFCI outlet (Ground Fault Circuit Interrupter) is a special type of electrical outlet designed to protect people from electric shocks. Unlike standard outlets, GFCI outlets monitor the flow of electricity in two directions. If the outlet detects an imbalance, it quickly shuts off the power to prevent harm. How GFCI Outlets Work GFCI outlets measure the amperage of the current flowing to and from the outlet. If more power is going to the hot side of the outlet than is returning back, the GFCI trips and cuts off the electricity. This quick action helps prevent serious injuries or even electrocution, especially in wet or damp areas. GFCI outlets are essential for safety in areas where water and electricity might meet, like bathrooms and kitchens. Common Locations for GFCI Outlets You will often find GFCI outlets in places where water is present. Here are some common locations: Bathrooms: Near sinks and showers. Kitchens: Close to the sink and countertops. Garages: Especially near workbenches and utility sinks. Outdoor Areas: Patios, decks, and pool areas. Basements: Near sump pumps and laundry areas. In some cases, a single GFCI outlet can protect an entire circuit, even if the other outlets are not GFCIs. This means that one GFCI outlet can provide safety for multiple outlets downstream. Tools and Materials Needed for Replacing a GFCI Outlet Replacing a GFCI outlet is a straightforward task if you have the right tools and materials. Here’s a list of what you’ll need to get the job done safely and efficiently. Essential Tools To replace a GFCI outlet, you’ll need the following tools: Screwdrivers: Both flathead and Phillips head screwdrivers are necessary for removing and installing the outlet. Wire Stripper: This tool is essential for stripping the insulation off the wires. Pliers: Lineman’s pliers are useful for bending and cutting wires. Voltage Tester: A no-contact voltage tester or a multimeter is crucial for ensuring the power is off before you start working. Recommended Safety Gear Safety should always be a priority when working with electricity. Here’s what you should have: Safety Glasses: Protect your eyes from any debris or sparks. Insulated Gloves: These can help prevent electrical shocks. Materials Required In addition to tools, you’ll need a few materials to complete the job: New GFCI Outlet: Make sure it’s the right type for your location (indoor or outdoor). Electrical Tape: Useful for securing wire nuts and providing extra insulation. Wire Nuts: These are used to connect wires securely. Always double-check that the power is off at the electrical panel before starting any electrical work. Safety first! Step-by-Step Guide to Replacing a GFCI Outlet Replacing a GFCI outlet might seem daunting, but with the right steps, it can be straightforward. Follow this guide to ensure a safe and effective replacement. Turning Off the Power Safety first! Before you start, make sure to turn off the power at the electrical service panel. Locate the correct breaker and switch it off. Even if you believe the power is off, always test for voltage using a multimeter or voltage tester to confirm. Removing the Old Outlet Unscrew the old GFCI outlet from the outlet box. Gently pull the outlet forward, being careful not to touch the screws on the side, which might still be live if the power isn’t completely off. Label the black and white wires connected to the line side of the outlet before disconnecting them. This will help you connect them correctly to the new outlet. Installing the New GFCI Outlet Loosen the terminal screws on the old GFCI outlet to remove the wired connections, including the bare copper ground wire(s). Reconnect the wires to the comparable positions on the new GFCI outlet. If the wires look worn, cut and strip a small portion of the insulation. Carefully place the new GFCI outlet back into the outlet box, ensuring all connections are secure and neat. Testing the New Installation Turn the power back on at the service panel. Press the reset button on the new GFCI outlet to ensure it is functioning correctly. Use a multimeter or voltage tester to verify that the outlet is receiving power and is properly grounded. Replacing a GFCI outlet is a manageable task if you follow these steps carefully. Always prioritize safety and double-check your work to ensure everything is correctly installed. Troubleshooting Common Issues with GFCI Outlets GFCI Outlet Won’t Reset If your GFCI outlet won’t reset, it could be due to a few reasons. One common reason for GFCI tripping is a ground fault. GFCI outlets are designed to detect even small irregularities in electrical currents for added safety. Here are some steps to troubleshoot: Check for Ground Faults: Inspect the outlet and connected devices for any signs of moisture or damage. Test the Outlet: Use a multimeter to check if the outlet is receiving power. Reset the Breaker: Sometimes, the issue might be with the circuit breaker. Ensure it is not tripped. Replace the Outlet: If the outlet is old or damaged, it might need replacement. If the reset button does not snap into place when you push it, then the outlet may need a full replacement. No Power to GFCI Outlet When there’s no power to your GFCI outlet, it can be frustrating. Here are some

How To Fix/Replace GFCI Outlet Read More »

Why Do My LED Lights Flicker and How to Fix It in Your Home

LED lights are popular because they save energy and last a long time. But sometimes, they can flicker, which can be really annoying. Flickering LED lights can make it hard to focus, and they might even hurt your eyes. There are a few reasons why this happens, but the good news is that you can usually fix it yourself. In this article, we’ll look at why your LED lights might be flickering and how you can stop it. Key Takeaways Loose bulbs are a common cause of flickering LED lights; make sure they are screwed in tightly. Voltage changes in your home can make LED lights flicker; using a voltage regulator can help. Not all LED lights work well with dimmer switches; check if your bulbs and dimmers are compatible. A bad LED driver can cause flickering; replacing it with a good one can solve the problem. If you can’t fix the flickering yourself, it might be time to call a professional electrician. Common Causes of Flickering LED Lights Loose Bulbs One of the simplest reasons for flickering LED lights is loose bulbs. If the bulb isn’t screwed in tightly, it can cause intermittent contact with the socket, leading to flickering. Make sure to check and secure the bulb properly. Voltage Fluctuations Voltage fluctuations in your home’s electrical supply can also cause LED lights to flicker. This can happen due to power surges, dips, or when large appliances switch on and draw a lot of power. The instability in the electricity supply can make your lights flicker, especially in areas with inconsistent power. Incompatibility with Dimmer Switches LED lights and dimmer switches don’t always get along. Not all LED lights are designed to work with dimmer switches, and even those that are might not work with all types of dimmers. Using LED bulbs with dimmers designed for halogen can cause flickering because dimmers reduce the current sent to the bulb, which doesn’t work well with LEDs that need a constant current. Faulty LED Drivers The LED driver is crucial for the proper functioning of LED lights. It regulates the voltage supplied to the LED bulb. A faulty or low-quality LED driver may not regulate the voltage properly, causing flickering lights. LED lights need a constant voltage to work correctly, and any fluctuations can cause them to flicker. How to Fix Flickering LED Lights Securing Loose Bulbs If your LED lights are flickering due to loose or improperly inserted bulbs, the fix can be as simple as tightening the bulb into the socket. Ensure the bulb is securely screwed into the socket so it maintains consistent contact with the electrical socket. Be careful not to overtighten, as this could potentially damage the bulb or the socket. Stabilizing Voltage Supply If flickering is caused by fluctuations in the voltage supplied to your house, consider investing in a voltage regulator. This device can stabilize the voltage coming into your home, reducing the chances of your lights flickering due to power surges or dips. If the problem persists, you might need to contact your local electricity provider for further assistance. Ensuring Dimmer Switch Compatibility If you’re using a dimmer switch with your LED lights, make sure both are compatible with each other. Use LED bulbs that are labelled as dimmable, and pair them with dimmer switches that are specifically designed to work with LED lights. If you’re not sure about compatibility, consult with a lighting specialist or the bulb manufacturer. Replacing Faulty LED Drivers If the LED driver is faulty or of low quality, it may fail to regulate the voltage supplied to the LED bulb effectively. This could cause the lights to flicker. In this case, consider replacing the driver with a high-quality one that can deliver a constant voltage to your LED lights. You may need the help of a professional electrician for this task, especially if you’re not comfortable with electrical work. Understanding the Role of LED Drivers What is an LED Driver? Think of an LED driver as the heart of your LED lights. It controls the power flowing to the LED light source. Without a driver, LEDs couldn’t function correctly. LED drivers convert the high voltage AC from your home into low voltage DC needed by LEDs. This conversion is crucial for the stable operation of your lights. Signs of a Faulty LED Driver A faulty LED driver can cause several issues, including flickering lights. Here are some common signs: Regular flickering: If your lights flicker in a consistent pattern, it might be a sign that the driver is failing. Dim lights: If your LEDs are not as bright as they used to be, the driver might not be supplying enough power. Intermittent operation: Lights that turn on and off randomly can indicate a driver problem. How to Replace an LED Driver Replacing an LED driver is a straightforward process if you follow these steps: Turn off the power: Ensure the power to the light fixture is turned off to avoid any electrical hazards. Remove the fixture: Carefully take down the light fixture to access the driver. Disconnect the old driver: Note the wiring connections and disconnect the faulty driver. Connect the new driver: Match the wiring connections and secure the new driver in place. Reinstall the fixture: Put the light fixture back and turn on the power to test the new driver. Regular maintenance and using high-quality drivers can prevent many common issues with LED lights. Dealing with Electromagnetic Interference Identifying Sources of Interference Household appliances like fridges, microwaves, and air conditioners can cause electromagnetic interference (EMI) that leads to flickering LED lights. These appliances generate electromagnetic fields when they are in operation. If your LED lights are too close to these appliances, or if the wiring is arranged such that the circuits overlap, the electromagnetic field might interfere with the electrical current in the LED bulbs, causing them to flicker. Rearranging Appliances and Circuits To minimize the impact of EMI, consider rearranging your appliances. This is

Why Do My LED Lights Flicker and How to Fix It in Your Home Read More »

Mastering Room Lighting: How to Calculate the Perfect Lumens

Getting the right lighting for each room is important to make spaces comfortable and useful. Lumens per square foot help you find the perfect light level. This guide will teach you how to calculate lumens for different rooms, choose the best LED lights, and understand what affects lumen needs. Whether it’s for your home or a business, you’ll learn how to create well-lit, pleasant spaces. Key Takeaways Understanding lumens helps you get the right light level for each room. Different rooms need different amounts of lumens based on their use. LED lights come in various types, like spotlights and strip lights, to fit different needs. Room size, ceiling height, and wall colors affect how many lumens you need. Using dimmable lights and energy-efficient options can save money and improve comfort. Understanding Lumens and Their Importance What Are Lumens? Lumens measure the total amount of visible light emitted by a source, like a light bulb. Unlike watts, which measure power use, lumens tell us how bright the light is. The higher the lumens, the brighter the light. This is crucial for devices like projectors, where brightness directly affects image quality. Why Lumens Matter in Lighting Design Getting the right brightness is key when choosing light fixtures. If a room is too dim, it feels gloomy; if it’s too bright, it can be harsh. Lumens help us find the perfect balance. Different rooms need different lighting. For example: A workspace needs bright light to help you see clearly and reduce eye strain. A bedroom needs softer light to help you relax. Comparing Lumens to Watts In the past, we used watts to judge how bright a light would be. But watts only measure energy use, not brightness. Now, we use lumens to measure brightness. Here’s a quick comparison: Watts (Incandescent Bulb) Lumens (LED Bulb) 40W 450 lm 60W 800 lm 75W 1100 lm 100W 1600 lm By understanding lumens, you can choose the right light for any room, making it comfortable and functional. Calculating Lumens for Different Rooms Understanding the right amount of light for each room is essential for creating comfortable and functional spaces. Lumens per square foot serve as a key metric for achieving optimal lighting. In this guide, we’ll delve into the intricacies of calculating lumens for various environments, whether it’s your home or a commercial space. Choosing the Right LED Lights Selecting the right LED lights can transform your space, making it both functional and inviting. Here’s a guide to help you choose the best LED lights for your needs. Factors Influencing Lumen Requirements Room Size and Layout The size and layout of a room are crucial in determining how many lumens are needed. Larger rooms require more lumens to ensure adequate lighting. For instance, a small bedroom will need fewer lumens compared to a spacious living room. The layout also matters; open floor plans might need more lumens to cover the entire area evenly. Ceiling Height Higher ceilings mean that light has to travel a greater distance to reach the floor, which can reduce its intensity. Therefore, rooms with higher ceilings will generally require more lumens. For example, a room with a 10-foot ceiling will need more lumens than a room with an 8-foot ceiling to achieve the same level of brightness. Color and Reflectance of Surfaces The color and reflectance of the surfaces in a room can significantly impact lumen requirements. Light-colored walls and ceilings reflect more light, making the room appear brighter. On the other hand, dark-colored surfaces absorb more light, requiring more lumens to achieve the same brightness level. For instance, a room with dark walls will need more lumens compared to a room with light walls. When planning your lighting, always consider the purpose of the space and how these factors will influence your lumen needs. Practical Tips for Effective Lighting When it comes to lighting your home, there are several practical tips to keep in mind to ensure you get the best results. Here are some key strategies to consider: Layering Light Sources Layering light sources is essential for creating a well-lit room. Use a mix of ambient, task, and accent lighting to provide targeted illumination without overwhelming the room. For example, use wall sconces, floor lamps, and small pendant lights to create a balanced lighting scheme. Using Dimmable Lights Dimmable lights offer flexibility and comfort. They allow you to adjust the brightness to suit different activities and moods. Consider installing dimmable LED downlights or recessed lights for a modern and streamlined look. These fixtures provide ambient lighting and can be easily dimmed to set the desired mood. Energy Efficiency Considerations Energy efficiency is crucial for both cost savings and environmental impact. Use high-efficiency light sources to reduce energy consumption. For example, replacing high-pressure mercury vapor lamps with fluorescent lamps can save up to 43% in energy. Additionally, consider using renewable energy sources like solar or wind to power your lighting. By layering different types of light sources and using dimmable options, you can create a versatile and energy-efficient lighting scheme that enhances the comfort and functionality of your space. Advanced Lumen Calculation Techniques Using Lighting Calculation Charts Lighting calculation charts are a handy tool for determining the number of luminaires needed for a space. These charts consider factors like room size, ceiling height, and desired illumination levels. For example, a chart might show that to achieve 500 lux in a 60 square meter room, you need 12 luminaires of a specific type. Using these charts can simplify the process and ensure you get the right amount of light for your needs. Software Tools for Lumen Calculation There are various software tools available that can help you calculate the lumens required for different spaces. These tools take into account multiple variables such as room dimensions, surface reflectance, and light fixture types. Some popular software options include DIALux, Relux, and AGi32. These tools provide a more detailed and accurate lumen calculation compared to manual methods. Professional Lighting Consultation Sometimes, the best way

Mastering Room Lighting: How to Calculate the Perfect Lumens Read More »

The Vital Role of Lightning Rods in Protecting Your Property

Lightning rods play a crucial role in protecting homes and buildings from the dangers of direct lightning strikes. Understanding how they work, their benefits, and the importance of proper installation and maintenance can help ensure your property stays safe during thunderstorms. Key Takeaways Lightning rods provide essential protection against direct lightning strikes, not electrical surges. Properly installed lightning rods can prevent fires caused by lightning strikes. These systems safeguard electrical systems within buildings, reducing the risk of damage. Lightning rods help prevent structural damage to buildings during storms. Routine maintenance and professional installation are key to ensuring the effectiveness of lightning rod systems. Understanding Lightning and Its Dangers How Lightning Forms Lightning is a natural electrical discharge that occurs during thunderstorms. It forms when there is a buildup of electrical charges in the clouds. These charges are usually separated into positive and negative regions. When the difference in charge becomes too great, a sudden discharge of electricity, known as lightning, occurs. Types of Lightning Strikes There are several types of lightning strikes, each with its own characteristics: Cloud-to-Ground Lightning: This is the most dangerous type, where the lightning bolt travels from the cloud to the ground. Intra-Cloud Lightning: This occurs within a single cloud and is the most common type of lightning. Cloud-to-Cloud Lightning: This type happens between two separate clouds. Ground-to-Cloud Lightning: This is less common and occurs when lightning travels from the ground up to the cloud. Potential Damage from Direct Strikes Lightning strikes can cause significant damage to property and pose serious risks to personal safety. Direct strikes can lead to fires, electrical system failures, and structural damage. The intense heat from a lightning strike can ignite flammable materials, while the electrical surge can fry electronic devices and wiring systems. Being struck by danger, lightning can be incredibly destructive, making it essential to understand and mitigate these risks. How Lightning Rods Work Basic Principles of Operation Lightning rods are designed to protect buildings from lightning strikes. They work by providing a path of least resistance for the electrical discharge. When lightning starts with a downward tracer, it can hit any object on the ground. The rod attracts this tracer, guiding the lightning safely to the ground. Components of a Lightning Rod System A lightning rod system has several parts: Rod: The metal rod that sits on top of the building. Conductor: A metal wire that connects the rod to the ground. Grounding System: The part buried in the ground that disperses the electricity. The Science Behind Lightning Rods The science behind lightning rods is simple. They use the principle of electrical conductivity. The rod and conductor are made of materials that easily carry electricity. When lightning strikes, the system directs the energy away from the building and into the ground. Installing a lightning rod can save your property from severe damage. It’s a small investment for a lot of protection. Benefits of Installing Lightning Rods Protection Against Fire Lightning rods can prevent fires by directing the electrical charge safely into the ground. This reduces the risk of a lightning strike causing a fire in your home. While residential lightning rods are effective in mitigating damage, they aren’t foolproof. They don’t reduce the risk of a lightning strike on your home, but they do help manage the impact. Safeguarding Electrical Systems A lightning rod system can protect your home’s electrical systems. When lightning strikes, it can cause power surges that damage appliances and electronics. By channeling the electricity away, lightning rods help keep your devices safe. Preventing Structural Damage Lightning strikes can cause severe structural damage to buildings. A lightning rod system helps prevent this by providing a direct path for the electrical charge to follow, reducing the risk of damage to the building’s structure. Installing a lightning rod system is a smart way to protect your property from the unpredictable nature of lightning strikes. Installation and Maintenance of Lightning Rods Professional Installation Guidelines Installing a lightning rod system is not a DIY project. Hiring a professional ensures the system is set up correctly and safely. The cost of a lightning protection system in 2024 ranges from $440 to $2,660, with an average of about $1,550. This investment can save your property from severe damage. Routine Maintenance Tips Regular maintenance is key to keeping your lightning rod system effective. Here are some tips: Inspect the system annually for any wear or damage. Ensure all connections are tight and corrosion-free. Replace any damaged components immediately. Common Installation Mistakes to Avoid Avoid these common mistakes to ensure your lightning rod system works properly: Incorrect placement of rods, which can leave parts of your property unprotected. Using materials that are not designed for lightning protection. Failing to connect the system to a proper grounding network. Regular checks and professional installation can make a big difference in the effectiveness of your lightning rod system. Case Studies of Lightning Rod Effectiveness Residential Property Protection In a small town, a family home was saved from a lightning strike because of a well-placed lightning rod. The lightning rod diverted the lightning currents safely into the ground, preventing any fire or electrical damage. This case shows how important it is to have a lightning rod system in place. Commercial Building Safety A large office building in the city had a lightning rod system installed. During a severe storm, the building was hit by lightning. Thanks to the lightning rod, the building did not suffer any structural damage or electrical failures. This example highlights the importance of protecting commercial properties from lightning strikes. Historical Examples of Successful Interventions In the 1800s, a famous church was struck by lightning. However, because it had a lightning rod, the church was not damaged. This historical case proves that lightning rods have been effective for a long time. Installing a lightning rod can make a big difference in protecting your property from lightning strikes. Myths and Misconceptions About Lightning Rods Debunking Common Myths There are many myths about lightning rods

The Vital Role of Lightning Rods in Protecting Your Property Read More »

Why You Should Install EV Charge Points

Electric vehicles (EVs) are becoming more popular, and the need for EV charge points is growing fast. Installing these charge points today can bring many benefits to businesses, the environment, and the community. This article will explore the economic advantages, environmental impact, technological advancements, common concerns, strategic placement, future trends, and safety of EV charging stations. Key Takeaways EV chargers can be installed in both residential and commercial locations. Installing EV charge points can attract more customers and increase property value. EV charging stations help reduce carbon footprints and support green transportation. Technological advancements like fast and wireless charging make EVs more convenient. There are solutions to common concerns like charging speed, cost, and compatibility. Strategically placed EV charging stations can meet the diverse needs of different communities. The Economic Benefits of Installing EV Charge Points Attracting EV Owners to Your Business Installing EV charge points can draw more customers to your business. EV owners often plan their stops around charging stations, so having one can make your location a preferred choice. This can lead to increased foot traffic and higher sales. Increasing Property Value Properties with EV charging stations are seen as more modern and forward-thinking. This can boost your property’s value. Potential buyers or tenants may be willing to pay more for the convenience of having a charging station on-site. Accessing Government Incentives Many government entities offer financial incentives for businesses that install EV charging stations. These can include tax credits, grants, and rebates. Taking advantage of these incentives can significantly reduce the cost of installation and make the investment more attractive. Installing EV charge points not only benefits your business but also supports the broader adoption of electric vehicles, contributing to a cleaner environment and a sustainable future. Environmental Impact of EV Charging Stations Reducing Carbon Footprint Electric vehicles (EVs) have no tailpipe emissions, which means they don’t release harmful gases while driving. However, generating the electricity used to charge EVs may create carbon pollution. By installing EV charge points, we can support the use of renewable energy sources, which significantly reduces the overall carbon footprint. Promoting Sustainable Transportation EV charging stations encourage the adoption of electric vehicles, which are more environmentally friendly than traditional gasoline-powered cars. This shift promotes sustainable transportation and helps reduce our dependence on fossil fuels. Supporting Renewable Energy Integration EV charging stations can be integrated with renewable energy sources like solar and wind power. This integration not only provides clean energy for charging vehicles but also supports the broader adoption of renewable energy technologies. By combining EV charging with renewable energy, we can create a more sustainable and resilient energy system. Technological Advancements in EV Charging Fast Charging Solutions Fast charging solutions are making it easier and quicker to charge electric vehicles (EVs). New technologies allow EVs to charge up to 80% in just 30 minutes. This is a game-changer for long trips and busy schedules. Fast chargers are becoming more common at public stations, making it convenient for EV owners to top up their batteries quickly. Wireless Charging Innovations Wireless charging is the next big thing in EV technology. Using electromagnetic induction, cars can charge without plugging in. This makes charging as simple as parking your car. Some pilot projects are even testing charging while driving, which could keep EVs on the road longer without stopping. Vehicle-to-Grid Technology Vehicle-to-Grid (V2G) technology allows EVs to send power back to the grid. This can help balance energy supply and demand, especially during peak times. V2G can also support renewable energy sources by storing excess power and releasing it when needed. This technology is still in its early stages but has great potential for the future. Addressing Common Concerns About EV Charging Charging Speed and Convenience One of the main worries for EV owners is the charging speed. Many people are used to the quick refuel times of gas stations and find it hard to adjust to longer EV charging times. However, advancements in fast charging solutions are making it easier to charge EVs quickly. Public charging stations are also becoming more common, making it convenient for EV owners to find a place to charge their vehicles. Cost of Installation and Maintenance The cost of installing and maintaining EV charge points can be a significant concern. While the initial investment can be high, there are various government incentives and rebates available to offset these costs. Additionally, the long-term savings on fuel and maintenance can make the investment worthwhile. It’s important to plan for proper maintenance to ensure the longevity and reliability of the charging stations. Compatibility with Different EV Models Another common concern is whether a charging station will be compatible with different EV models. Most modern charging stations are designed to be compatible with a wide range of vehicles. However, it’s always a good idea to check the specifications to ensure compatibility. This helps avoid issues related to charger and EV incompatibility. Addressing these concerns can make the transition to electric vehicles smoother and more appealing for potential EV owners. Strategic Placement of EV Charging Stations Urban vs. Rural Considerations When planning EV charging stations, it’s crucial to consider the different needs of urban and rural drivers. Urban drivers often live in apartments and may not have access to home chargers, so they need more public charging stations. On the other hand, rural drivers usually have home chargers but drive longer distances, requiring strategically placed fast-charging stations. Public vs. Private Charging Stations Public charging stations are essential for those who can’t charge at home, while private stations are often found at workplaces or commercial locations. Balancing the availability of both types ensures that all EV drivers have access to charging, regardless of their living or working situation. Meeting Community Needs Charging station placement should reflect the travel patterns and needs of the community. This includes considering the number and type of EVs in the area and how long it takes to charge them. Equitable access is also important, ensuring that low-income and

Why You Should Install EV Charge Points Read More »

EMF Shielding For Home Wiring

Electromagnetic fields (EMFs) are invisible areas of energy that are often associated with the use of electrical power. Many homeowners are becoming increasingly concerned about the potential health risks posed by EMFs. This article will explore various techniques to shield home wiring from EMFs, offering practical solutions to reduce exposure. Key Takeaways Understanding the basics of EMFs and their sources in homes is crucial for effective mitigation. Choosing the right materials, such as shielded cables, can significantly reduce EMF levels. Proper installation techniques, including grounding and using conduits, enhance EMF shielding. Advanced solutions like copper mesh and Faraday cages provide higher levels of EMF protection. Regular testing and measurement of EMF levels help identify problem areas and verify the effectiveness of mitigation efforts. Understanding EMF Mitigation in Home Wiring Basics of Electromagnetic Fields Electromagnetic fields (EMFs) are invisible areas of energy, often referred to as radiation, that are associated with the use of electrical power. Normal, correctly functioning household wiring should not be a source of magnetic fields, because wherever there is a current, there is a magnetic field. The two main types of EMFs are electric fields, which are created by voltage, and magnetic fields, which are created by current flow. Health Implications of EMF Exposure Research has shown that exposure to high levels of EMFs can have various health effects. Some studies suggest a link between EMF exposure and conditions such as headaches, anxiety, depression, and even more serious illnesses like cancer. It’s important to understand that while the science is still evolving, taking steps to reduce EMF exposure in the home can be beneficial. Common Sources of EMF in Homes In homes, EMFs can come from various sources. Common sources include household wiring and appliances. Appliances like microwaves, refrigerators, and televisions can emit EMFs. Additionally, household wiring and appliances can contribute to the overall EMF levels in a home. Ensuring that wiring is properly installed and maintained can help mitigate these fields. Choosing the Right Materials for EMF Shielding Benefits of Shielded Cables Shielded cables are a great choice for reducing EMF in your home. They help block electromagnetic interference from other devices, making your home safer. These cables are especially useful in areas with many electronic devices. Comparing Different Types of Wiring When it comes to wiring, not all types are equal. Some materials, like copper, are better at blocking EMF than others. Here’s a quick comparison: Material Effectiveness Cost Copper High Moderate Aluminum Medium Low Gold Very High Very High Cost Considerations While choosing materials, it’s important to think about cost. Copper is a popular choice because it balances effectiveness and price. However, if budget allows, gold offers the best protection. Aluminum is a cheaper option but is not as effective. Investing in the right materials can make a big difference in reducing EMF exposure in your home. Installation Techniques for Effective EMF Mitigation Proper Grounding Methods Proper grounding is essential for reducing EMF in your home. Grounding helps to direct unwanted electrical currents safely into the earth, minimizing the electromagnetic fields that can affect your living space. Ensure that all electrical systems are properly grounded according to local codes and standards. Twisting Wires to Reduce EMF Twisting wires together can significantly reduce EMF emissions. When wires are twisted, the magnetic fields generated by the current in each wire cancel each other out. This technique is especially useful for household wiring and appliances, where older techniques of wiring can be sources of magnetic fields. Using Conduits and Raceways Using conduits and raceways to encase electrical wiring can also help in reducing EMF. These protective coverings shield the wires and prevent the electromagnetic fields from spreading into your living areas. Materials like steel or aluminum conduits are particularly effective for this purpose. Implementing these installation techniques can greatly reduce the EMF levels in your home, creating a safer and more comfortable living environment. Advanced EMF Shielding Solutions Using Copper Mesh for Shielding Copper mesh is a popular choice for EMF shielding. It is effective in blocking electromagnetic waves and is easy to install. Copper mesh can be used in walls, ceilings, and floors to create a barrier against EMF. However, it is important to ensure that the mesh is properly grounded to maximize its effectiveness. Implementing Faraday Cages Faraday cages are enclosures made of conductive materials that block external electric fields. They are highly effective in reducing EMF exposure. To create a Faraday cage, you can use materials like copper or aluminum. These cages can be used to shield entire rooms or specific devices. When building a Faraday cage, make sure there are no gaps or openings that could allow EMF to penetrate. Specialized Shielding Paints Specialized shielding paints are another effective solution for reducing EMF in homes. These paints contain conductive materials that block electromagnetic waves. They can be applied to walls, ceilings, and floors. When using shielding paint, it is important to cover all surfaces thoroughly and to ground the painted area. This ensures that the paint provides maximum protection against EMF. Shielding solutions like copper mesh, Faraday cages, and specialized paints are essential for creating a safe living environment. They help reduce exposure to harmful electromagnetic fields, making your home a healthier place to live. For those looking for competitive pricing and a wide range of solutions, many EMI shielding companies offer outstanding service and products. Testing and Measuring EMF Levels Using Gauss Meters To start, you need a Gauss meter to measure electromagnetic fields (EMFs) in your home. These devices are easy to use and can help you find areas with high EMF levels. Simply turn on the meter and move it around your home, paying close attention to areas near electrical devices and wiring. Identifying High-EMF Areas Once you have your Gauss meter, walk around your home to identify high-EMF areas. Common sources include Wi-Fi routers, microwaves, and electrical panels. Make a list of these spots so you can focus on reducing EMF exposure in these areas. Interpreting EMF Readings

EMF Shielding For Home Wiring Read More »

The Ultimate Guide to Whole House Surge Protection Devices: Protect Your Home and Electronics

In today’s tech-filled world, protecting your home’s electronics from power surges is more important than ever. Whole house surge protection devices offer a complete solution to safeguard your valuable gadgets and appliances from unexpected voltage spikes. This guide will walk you through everything you need to know about these essential devices. Key Takeaways Whole house surge protectors shield your electronics from damaging power surges. Different types of surge protectors are available, including panel-mounted, meter-based, and plug-in options. Choosing the right surge protector involves assessing your home’s electrical needs and looking for key features. Proper installation and regular maintenance of surge protectors are crucial for effective protection. Investing in whole house surge protection can save you money in the long run by preventing costly repairs. Understanding Whole House Surge Protection Whole home surge protection ensures that every area of the house, from outlets to the main panel, is defended against electrical surges. Whole-house surge protectors are highly effective at safeguarding your home’s electrical systems and devices from sudden voltage spikes. Types of Whole House Surge Protection Devices When it comes to safeguarding your home from power surges, there are several types of whole house surge protection devices to consider. Each type offers unique benefits and is suited for different needs and setups. How to Choose the Right Surge Protector for Your Home Choosing the right surge protector for your home is crucial to keep your electronics safe. Here are some key points to consider: Assessing Your Home’s Electrical Needs First, evaluate your home’s electrical requirements. Consider the number of devices you need to protect and their sensitivity to power surges. This will help you determine the level of protection you need. Key Features to Look For When selecting a surge protector, look for these important features: Joule rating: Higher ratings offer better protection. Clamping voltage: Lower clamping voltage means better protection. Response time: Faster response times are more effective. Number of outlets: Ensure it has enough outlets for your needs. Top Brands and Models Some of the top brands to consider include Eaton, Siemens, and Leviton. For instance, if you want a surge protector for your home office or entertainment setup, the Tripp Lite Protect It 12-Outlet Surge Protector TLP1208SAT is your best choice. Remember, not all surge protectors are created equal. Depending on your specific needs, including the number of appliances and their sensitivity, we will help you select the right whole house surge protector for your home. Installation Process for Whole House Surge Protectors Installing whole house surge protection is a crucial step to protect your home’s electronics and appliances. Here’s a step-by-step guide to ensure a successful installation: Maintenance and Inspection of Surge Protection Devices Regular Maintenance Tips To keep your surge protection devices working well, regular maintenance is key. Check your surge protectors and electrical panel often for any signs of wear or damage. Make sure everything stays securely connected. If you see any faults, replace the device right away. Signs Your Surge Protector Needs Replacement Surge protectors can wear out over time, especially after frequent or severe surges. Look for these signs to know when it’s time to replace them: Indicator lights are off or not working. Visible damage or wear on the device. The device has reached its maximum joule rating. Professional Inspection Services While you can do basic checks yourself, it’s a good idea to have a professional inspect your surge protection system regularly. They can spot issues you might miss and ensure everything is working correctly. This can give you peace of mind that your home is protected from electrical surges. Regular inspections and maintenance can help you get the most out of your surge protection investment. Don’t wait for a problem to arise; stay proactive in keeping your devices in top shape. Cost Considerations for Whole House Surge Protection Initial Investment Costs The cost of a whole home surge protector can range from $100.00 to $400.00, excluding professional installation fees. This upfront investment might seem high, but it can save you a lot of money in the long run by preventing damage to your electronics and appliances. Long-Term Savings By keeping your surge protection devices well-maintained, you can prevent damage to your electronics and ensure continuous protection. This means fewer replacements and repairs, which translates to long-term savings. Warranty and Insurance Options Many whole house surge protectors come with warranties that can cover damages if the device fails. Additionally, some home insurance policies offer discounts for homes with surge protection systems installed. This can further reduce the overall cost of protecting your home. Common Myths About Surge Protection Myth: Power Strips Offer Enough Protection A widespread fallacy is that power strips and surge protectors are interchangeable. While power strips with surge protection offer some level of defense, they do not provide the comprehensive protection that whole house surge protectors offer. Whole house surge protectors safeguard your entire electrical system, not just individual devices. Myth: Only Lightning Causes Surges Many people believe that only lightning strikes cause electrical surges. However, surges can also be caused by utility grid switching, faulty wiring, and high-powered appliances. Understanding these various sources can help you better protect your home. Myth: Surge Protectors Last Forever Surge protectors have a limited lifespan and need to be replaced periodically to ensure effective protection. Over time, their ability to absorb surges diminishes, making it crucial to monitor and replace them as needed. Regularly checking and replacing your surge protectors can prevent unexpected failures and ensure continuous protection for your home and electronics. Conclusion In today’s tech-filled homes, protecting your electronics from power surges is more important than ever. Whole house surge protection devices offer a reliable way to shield your gadgets and appliances from unexpected voltage spikes. By understanding how these devices work, choosing the right one, and ensuring proper installation and maintenance, you can keep your home safe and your electronics running smoothly. Investing in whole house surge protection is a smart move that can save you from costly

The Ultimate Guide to Whole House Surge Protection Devices: Protect Your Home and Electronics Read More »

Eaton CH Breaker Tripping

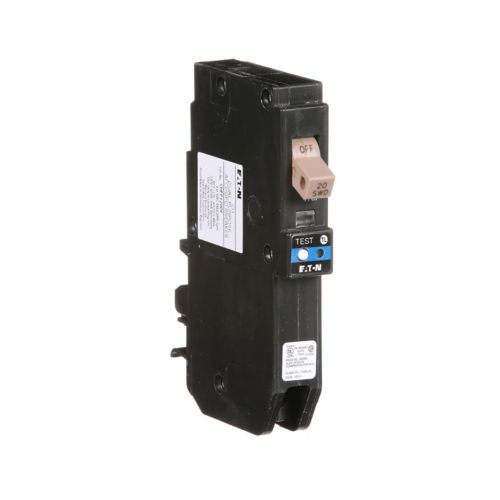
Back To blogs Document If your Eaton CH breaker keeps tripping, it can be really annoying and even a bit scary. This guide will help you understand why this might be happening and what you can do to fix it. From common causes to troubleshooting tips, we’ve got you covered. Key Takeaways Eaton CH breakers can trip due to electrical overloads, short circuits, or ground faults. Diagnosing a tripping breaker involves using the test button, checking LED indicators, and consulting an electrician if needed. Replacing a faulty breaker requires choosing the right replacement, following safety precautions, and a step-by-step guide. Regular maintenance, proper load distribution, and upgrading electrical components can help prevent breaker tripping. Faulty appliances can impact breaker performance, so identifying and replacing them is crucial. Common Causes of Eaton CH Breaker Tripping Electrical Overload An electrical overload happens when too many devices are drawing power from the same circuit. This can cause the breaker to trip to prevent overheating. Make sure to distribute your electrical devices across multiple circuits to avoid this issue. Short Circuit A short circuit occurs when a hot wire touches a neutral or ground wire. This can create a large amount of current flow, causing the breaker to trip immediately. If you notice your breaker tripping and not holding, it might be due to a short circuit. Ground Fault A ground fault happens when a hot wire comes into contact with a grounded part of the system, like a metal outlet box. This can be dangerous and cause the breaker to trip. Ground faults are often detected by breakers with AFCI/GFCI features, which are designed to protect against such issues. How to Diagnose a Tripping Eaton CH Breaker Using the Test Button If your Eaton breaker keeps tripping, start by using the test button. Pressing the test button will trip the breaker if it’s working correctly. This helps you check if the breaker itself is faulty. If the breaker trips immediately after pressing the test button, it might need replacement. Interpreting LED Indicators Eaton breakers often come with diagnostic LED indicators. For instance, if your 20 amp breaker trips and the LED flashes six times, this usually means a failed self-test. Understanding these blink patterns can help you identify internal faults and ensure your electrical system’s safety. Consulting an Electrician If you’re still having trouble, it might be time to call a professional. An electrician can perform a detailed self-diagnostic to pinpoint the issue. They can also advise if the breaker needs to be replaced or if there’s a deeper problem with your electrical setup. When your breaker keeps tripping without an obvious cause, even after unplugging all devices, a professional consultation is often the best course of action. Replacing a Faulty Eaton CH Breaker Choosing the Right Replacement When replacing a faulty Eaton CH breaker, it’s crucial to match the part number of the old breaker. This ensures compatibility and safety. If the model is discontinued, find an equivalent part. Eaton classified replacement circuit breakers are available in various types, including ground fault circuit breakers. Safety Precautions Before starting, always turn off the main power to avoid any risk of electric shock. Use insulated tools and wear protective gear. Double-check that the power is off by using a voltage tester. Step-by-Step Replacement Guide Turn off the main power supply. Remove the panel cover to access the breakers. Identify the faulty breaker and disconnect the wires attached to it. Carefully remove the faulty breaker from its slot. Insert the new breaker into the slot, ensuring it fits securely. Reconnect the wires to the new breaker, following the proper installation technique. Replace the panel cover and turn the main power back on. Test the new breaker to ensure it functions correctly. Always adhere to the manufacturer’s torque specifications when tightening connections. For example, Eaton breakers typically require 14-20 inch-pounds of torque. By following these steps, you can safely and effectively replace a faulty Eaton CH breaker. Preventive Measures to Avoid Breaker Tripping Implementing preventive measures can significantly reduce the likelihood of circuit breaker trips. Consider the following steps: Regular Maintenance Regular maintenance is crucial for a well-functioning electrical system. Addressing wiring problems promptly can help prevent unexpected breaker trips. Schedule routine inspections to identify and fix any issues before they become major problems. Proper Load Distribution Distribute electrical loads evenly across circuits to avoid overloading any single breaker. This can be achieved by: Using dedicated circuits for high-demand appliances like refrigerators and air conditioners. Avoiding the use of multiple high-wattage devices on the same circuit. Upgrading Electrical Components Older electrical components may not handle modern power demands efficiently. Upgrading to newer, more efficient components can help prevent breaker trips. Consider replacing outdated breakers and wiring to ensure compatibility with current electrical loads. By addressing wiring problems promptly and following preventive measures, you can minimize the likelihood of circuit breaker trips and maintain a well-functioning electrical system. Understanding Eaton CH Breaker Features AFCI and GFCI Functions Eaton CH breakers come with AFCI and GFCI functionality. These features help protect against electrical arcs and ground faults, making your home safer. AFCI stands for Arc Fault Circuit Interrupter, which prevents fires by detecting unintended electrical arcs. GFCI stands for Ground Fault Circuit Interrupter, which protects you from electric shocks by shutting off the circuit when it detects a ground fault. Plug-On Neutral Design One unique feature of the Eaton CH breaker is its plug-on neutral design. This means it doesn’t require a pigtail wire, making installation easier and cleaner. The plug-on neutral design also helps in reducing clutter inside the panel, which can improve overall safety and efficiency. Self-Test Mechanism Eaton CH breakers are equipped with a self-test mechanism. This feature allows the breaker to perform automatic diagnostics, providing immediate feedback through a sequence of blinks. These blinks serve as error codes, helping you identify and troubleshoot issues quickly. This self-test feature ensures that the breaker is always functioning correctly, adding an extra layer of safety to

Eaton CH Breaker Tripping Read More »